

The Calendar tab gives you a visual overview of your posts. This includes posts that have already been posted on your desired social media accounts, as well as queued posts. And you can easily switch from a Weekly Calendar format to a Daily Calendar format. You can also create new posts directly from this tab. Plus, you can use filters to quickly visualize your posts based on category or selected accounts.
Click on the green button that reads Create a new post (it’s located on the top left side of your screen). You can then start creating your post.
Inside the History tab, you can see the posts which have successfully been published. You can use filters and pick a specific date range to quickly surface information about the posts you’re interested in. On the left side of the tab, you have all your social media profiles and you can see how many posts have been published with Squirrly Social across your profiles. Clicking on any of them will reveal the full post.
The Post Groups tab allows you to see your posts, categorized based on their status: Drafts, Approved and Finished Sending.
You can also see your groups, timings and the social media profiles your posts go to.
On the left side of the interface, you’ll see all the groups you currently have.
You can add a new one by clicking the button Add Group. You will have to choose a name, to select on what platforms you want your posts to go, if you want the posts to repeat or not and if the posts are Draft or Approved.
To change the name of a group, select that group. Then click on the button that reads: Profiles & Repetition. You will then be able to update the group’s name.
If you don’t have any posts in the Drafts Tab or the Approved Tab, you will be able to see the Create a new post button.
If you already have posts there, then you will have to click the Create a new post button from the top banner.
In your Drafts Tab, you’ll see a small checkmark icon under the post. Click on it to approve and schedule your post.
Yes. Go to the Finished Sending tab and click on the copy icon you see under the post that you want to re-schedule.
For every new post that you create, you have the option to Add to Calendar or Save to Post Groups. The Add to Calendar option lets you schedule a time and date for your post to go out. If you pick the Save to Post Groups option, you will then have to select the group where you want that post to be saved. You also have to choose a status for it (Draft or Approved) and whether you want that post to be repeat itself or not. Finally, click save.
If you decide that you want some posts to go out multiple times, they will be posted on your selected social media accounts taking into account your current scheduling timeline – meaning they will NOT ever overlap with your posts that are scheduled. Instead, they will take the unallocated time slots. So, if you have nothing scheduled for Thursday, for example, your repeat posts will go out then. You can always check when these posts will go out inside the Calendar Tab.
Start by creating a new group. Name it Inspiration. Then, using the : Profiles & Repetition setting, only choose Friday as the day you want your posts to go out. This way, all posts you save to the Inspiration group, will be posted on Fridays.
You can create new folders for your images. Just click on the Add Subfolder button, give an appropriate name to your folder, and then start uploading your files there.
Yes. you can! If you want to move an image to a different folder, select the image you want to move. On the right side of the screen you will see a button that reads Move to. Click on it and from the drop-down, select the folder where you want to move the image to.
To add a new social media profile, go to @Manage Social Profiles and use the Add a social media profile button on the right side of your screen.
All you have to do is click on the Reconnect button you’ll see next to that particular social media profile.
Yes. You just have to click on the Add a social media profile, and add it again.
Click on Brand Settings -> Team members from the left side menu, and then add your team member’s email address in the Send Invitations tab.
A free course from the AISQ Growth team, built from real experiments, not theory.
ChatGPT traffic proven
Worksheets & templates included
No paywall
No credit card. No paywall. Lifetime access.
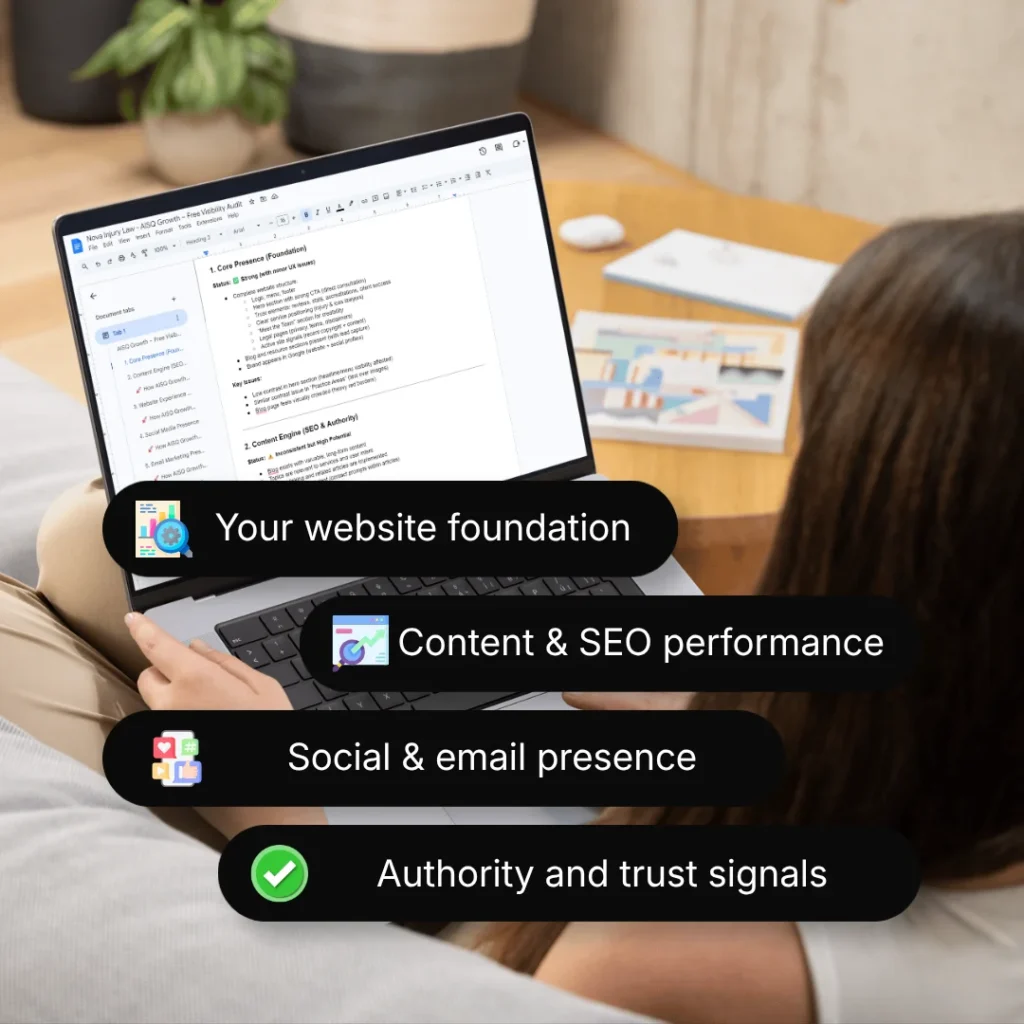
Get a free audit and see what’s blocking your visibility in Google and AI search.
No spam. Just actionable insights.

Social Media Assistant
You can find top-quality content from high-authority sources from around the web. You can filter results based on publishing date and country. Simply insert your topic inside the Search Box, select the filters you want to use, and click Search.
When you find a post that you like, you can add it to any post group you want. Under each post, you will see an Add to … button. This button also has a small arrow that will show you your current post groups. Choose the post group you want your post to be featured in.